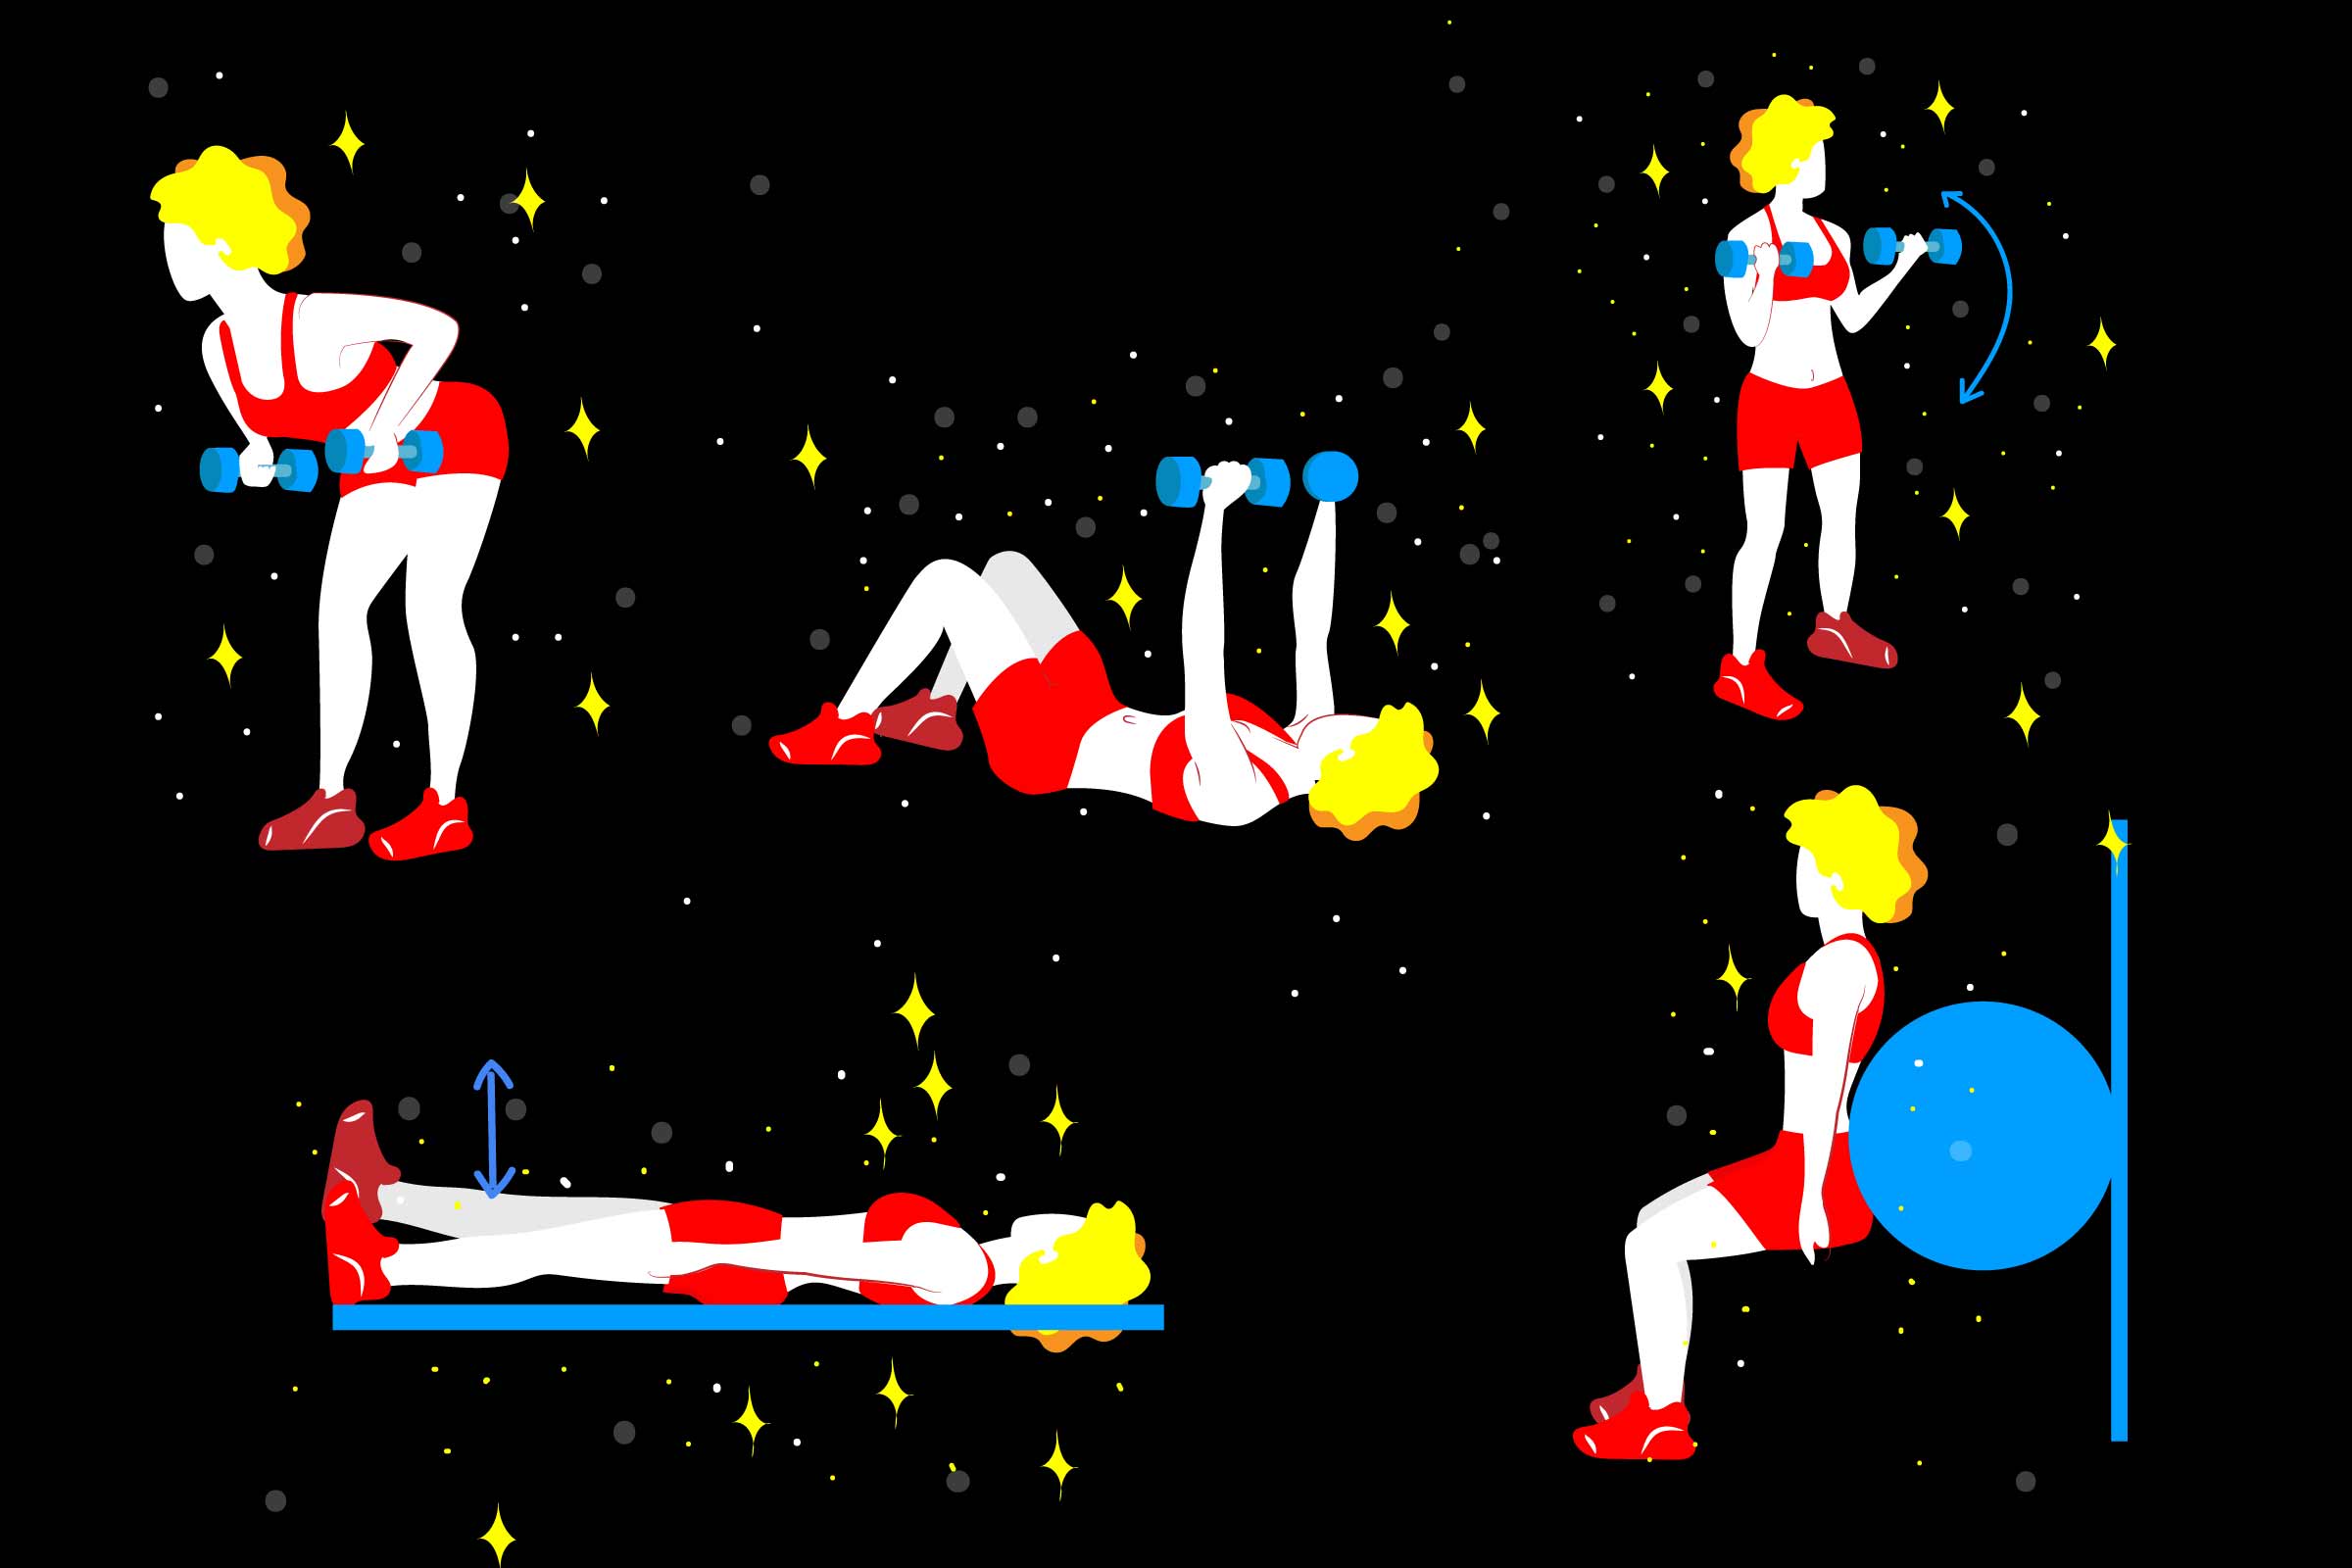

One word: good. Weight lifting when you have arthritis is very good, in fact, and here’s why. Weight lifting is a form of strength training that helps keep your muscles strong — and strong muscles support your joints.
What lifting weights won’t do is make your arthritis worse. Muscle-building exercises are an important part of your arthritis management plan, and your doctor will recommend it, whether you have osteoarthritis or an autoimmune, inflammatory form such as rheumatoid arthritis or psoriatic arthritis.
Think of your joints like a plant sapling (a young tree), says Karen Sutton, MD, associate attending orthopedic surgeon at the Hospital for Special Surgery in New York City. Saplings needs strings around them to help them grow straight and strong — just as joints need muscles and ligaments around them for support and stability. If you don’t have enough muscle, joints take a pounding. But as muscles become engaged and strengthen, they absorb some of the force, which takes pressure off weaker, worn-put joints, explains Dr. Sutton, who is also fellow with the American Academy of Orthopaedic Surgeons. That shift can translate to a decrease in arthritis symptoms and improvement in day-to-day function.
How Weight Lifting Helps Arthritis
Weight lifting eases joint pain and stiffness. An analysis of research published in the journal Rheumatology suggests that strengthening the muscle groups around affected joints improved function and eased pain in people with osteoarthritis. In another study, Finnish researchers found early RA patients who did strength training exercises twice a week for two years improved muscle strength by up to 59 percent; they also saw more reductions in inflammation, pain, morning stiffness, and disease activity when compared to RA patients who did only range-of-motion exercises.
Weight lifting boosts bone strength. Rheumatoid arthritis itself, along with some medications used for treating rheumatoid arthritis (such as corticosteroids), can increase your risk of osteoporosis, a condition that weakens your bones and makes them more prone to fracture. Inactivity due to joint pain can also contribute to bone loss; as does aging, more so for women, adds Dr. Sutton. By gently stressing your bones, strength training can increase bone density and reduce the risk of osteoporosis. Learn more about the connection between arthritis and osteoporosis.
Weight lifting helps maintain a healthy weight. A high body mass index (being overweight or obese) can make osteoarthritis and inflammatory arthritis even worse. It puts more pressure on your joints, particularly your knees. Also, as you age, you naturally begin to lose muscle mass, which slows down metabolism and can contribute to gradual weight gain.
To avoid this pound creep from a slower metabolism, you need a combination of cardio and weight training. “Cardio burns more calories during the workout,” explains Dr. Sutton. “With strength training, you get a longer-lasting calorie burn.”
Weight lifting improves balance. Strengthening your core can help increase balance and coordination and prevent falls, says Dr. Sutton. Being stronger also makes it easier to do everyday activities that are hard with arthritis, such as carrying groceries or gardening.
Precautions to Keep in Mind Before Lifting Weights with Arthritis
If you’re new to weight training, it’s always smart to first talk to your doctor. Your doctor or physical therapist can make sure the exercises are safe for you and help you gain strength, without exacerbating inflammation or aggravating joint pain.
More tips to help protect your joints when you start lifting weights:
Consider your equipment. Weight training uses free weights — like dumbbells or barbells — or weight machines for resistance. To start, dumbbells may be safer than a barbell, says Dr. Sutton. There may be an imbalance in the strength of your joints. Dumbbells allow you to work one arm or shoulder at a time; barbells require both at the same time.
A soup can or gallon of water can sub in for free weights occasionally and for certain exercises, says Dr. Sutton, but if you’re going to weight train regularly at home, it’s better to invest in a set of dumbbells. “The weight is distributed more appropriately and the grip can be better.” Buy them on Amazon or at a sporting goods store.
Choose the right weight. Dumbbells should be heavy enough to challenge your muscles in eight to 10 repetitions, without increasing joint pain. “Lighter weights with more reps will offer more benefits than fewer reps with super heavy weights,” says Dr. Sutton.
Start slowly. Ease your joints into exercise if you haven’t been active for a while. Push too hard too fast, and you can overwork your muscles and worsen joint pain. Start with just two or three reps per exercise, suggest experts at American Council on Exercise; then focus on increasing the number of reps versus the amount of weight lifted. As the exercise becomes easier, you can gradually increase the level of resistance and start using heavier weights.
Extend your warmup and cool-down time. It’s a good habit for everyone to do five or 10 minutes of stretching at the start and end of your workout to help elongate the muscles. If you have arthritis joint pain, however, it’s important to extend the warmup a little longer, advises Dr. Sutton. “That way your joints begin producing lubricating fluid so they move easier.” Her favorite warm-up includes two yoga poses: sun salutations and warrior poses.
Watch your form. Schedule a few sessions with a physical therapist or personal trainer to make sure your technique is correct, suggests Dr. Sutton. An expert can help tailor exercises to match your needs and abilities. At home, lift weights in front of a mirror to ensure proper form.
Move gently. Lift weights slowly and evenly. Try to go through the joint’s full range of motion.
Stay hydrated. You’ll be surprised at how quickly you burn calories and sweat while weight training, says Dr. Sutton, so be sure to drink plenty of water.
Do a little every day. If you have a flare of RA or an increase in OA pain, you should still stay active. Some simple stretching may diminish some of the pain.
Stop if anything hurts. Listen to the pain, say experts. Take a break when your joints start to ache. If you feel any new joint pain, it’s time to stop. Talk to your doctor about what pain is normal and when it’s a sign of something more serious.
Ask about other muscle-strengthening exercises. Many aquatic centers, YMCAs and community pools have exercise programs designed for people with arthritis, which may include weight-training routines that use water as resistance. Learn more about water exercises for arthritis.
Strength training can also be done with resistance bands and body weight exercises. Your doctor may also suggest isometric exercises, which are performed when your muscles contract, but joints don’t move (such as a plank).
Weight Lifting Exercises to Help Manage Arthritis Symptoms
Do muscle-strengthening exercises two to three times per week, with rest days in between. And be sure to target all major muscle groups. Start with the bigger muscles first — such as your abs, buttocks, and chest, says Dr. Sutton, who suggests starting every session with a core-strengthening plank. Then move on your arms and legs. Build up to 10 to 15 repetitions per exercise.
Here are some weight-lifting moves you can try at home. But always check with your doctor first to make sure they are safe for you:
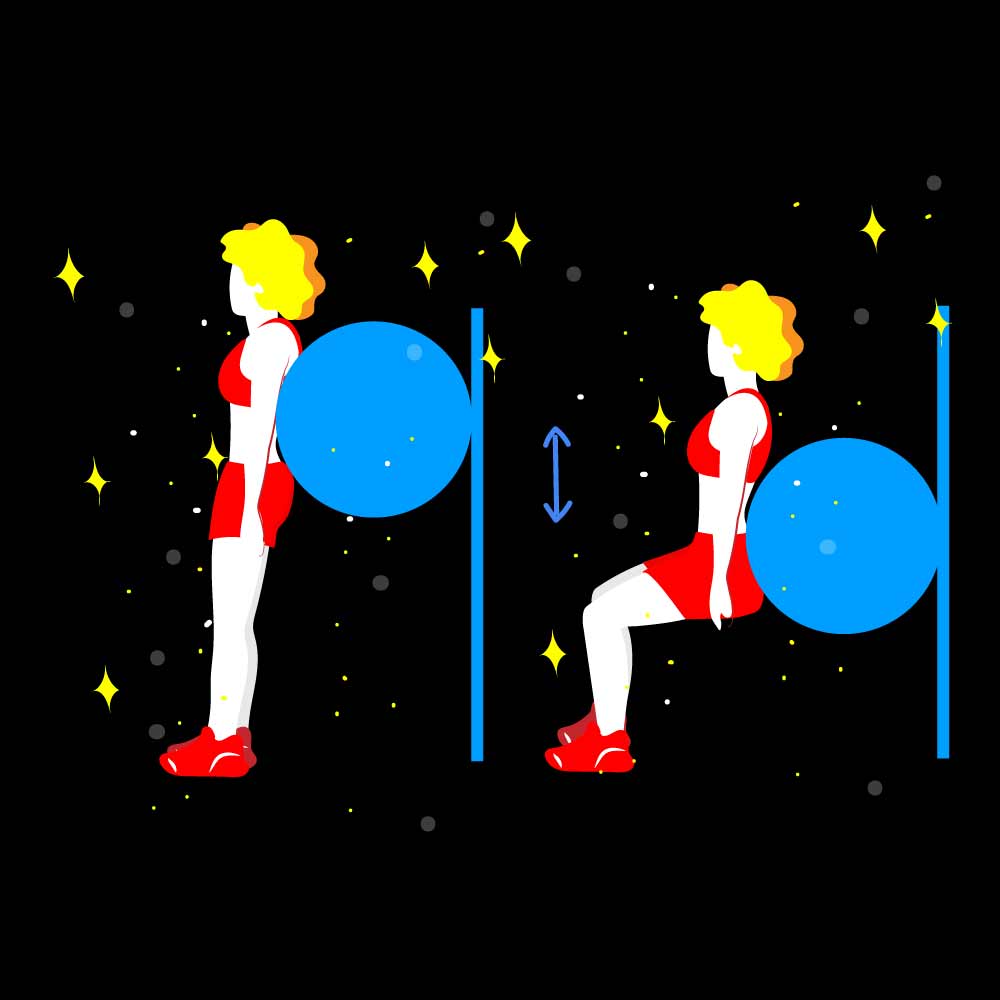

Wall squats
Strengthens your buttock muscles
Equipment needed: Stability ball, dumbbells optional
- Place a stability ball against a wall and gently lean against it, with the top of the ball in the small of your back. Position your feet in front of your body, shoulder-distance apart or a little wider.
- Without arching your back, gently lean into the ball and shift your weight into your heels.
- Slowly lower yourself, rolling the ball down the wall. Go down as far as you’re comfortable, or until your thighs are parallel to the floor. Make sure your knees don’t go over your toes, and your body is moving down rather than forward.
- Slowly push through your heels and bring your body back up to standing.
Tip: For added resistance, .
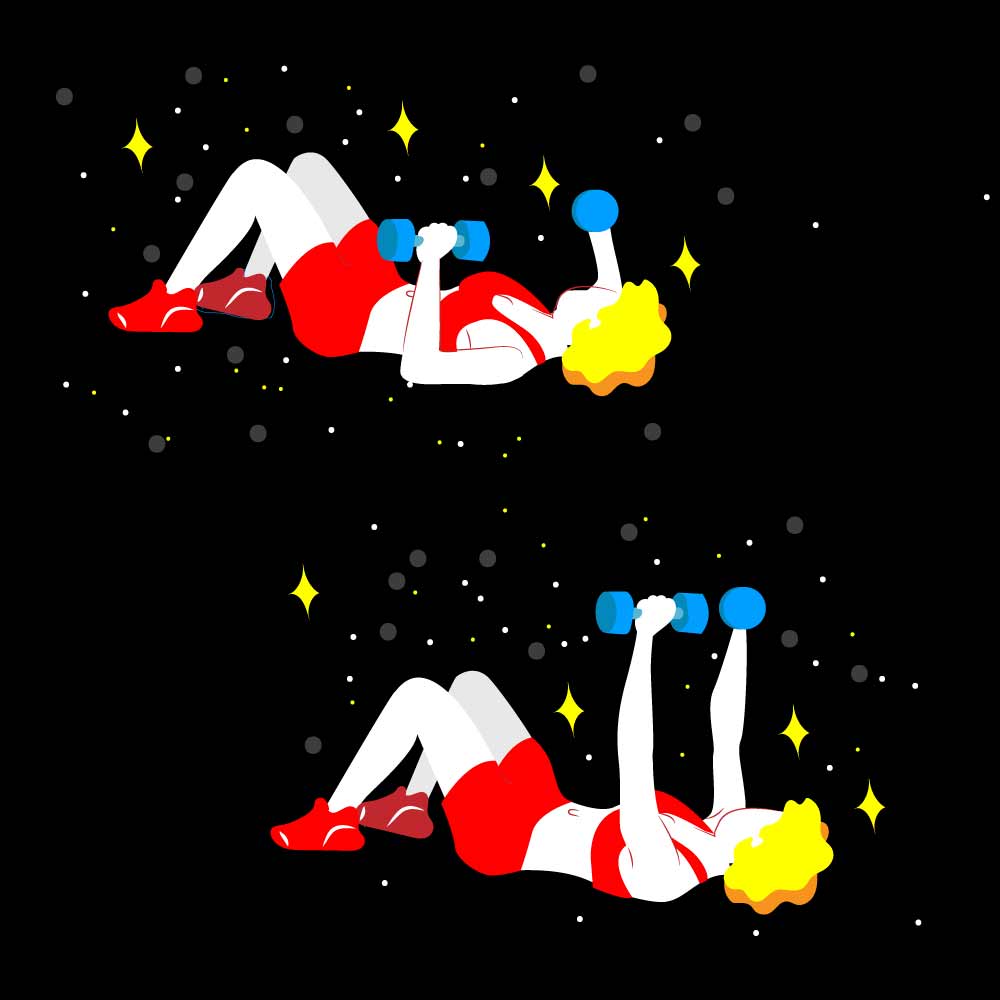

Chest Press
Strengthens chest and back of arms
Equipment needed: Dumbbells
- Lie on your back, with both knees bent and feet flat on the floor.
- Grasp a dumbbell in each hand, with your palms facing forward. Hold the dumbbells over your chest, bending your elbows to the sides.
- Slowly press the weights up, over your shoulders, until your elbows are almost straight.
- Slowly lower the weights back down.
Tip: Don’t arch your lower back.
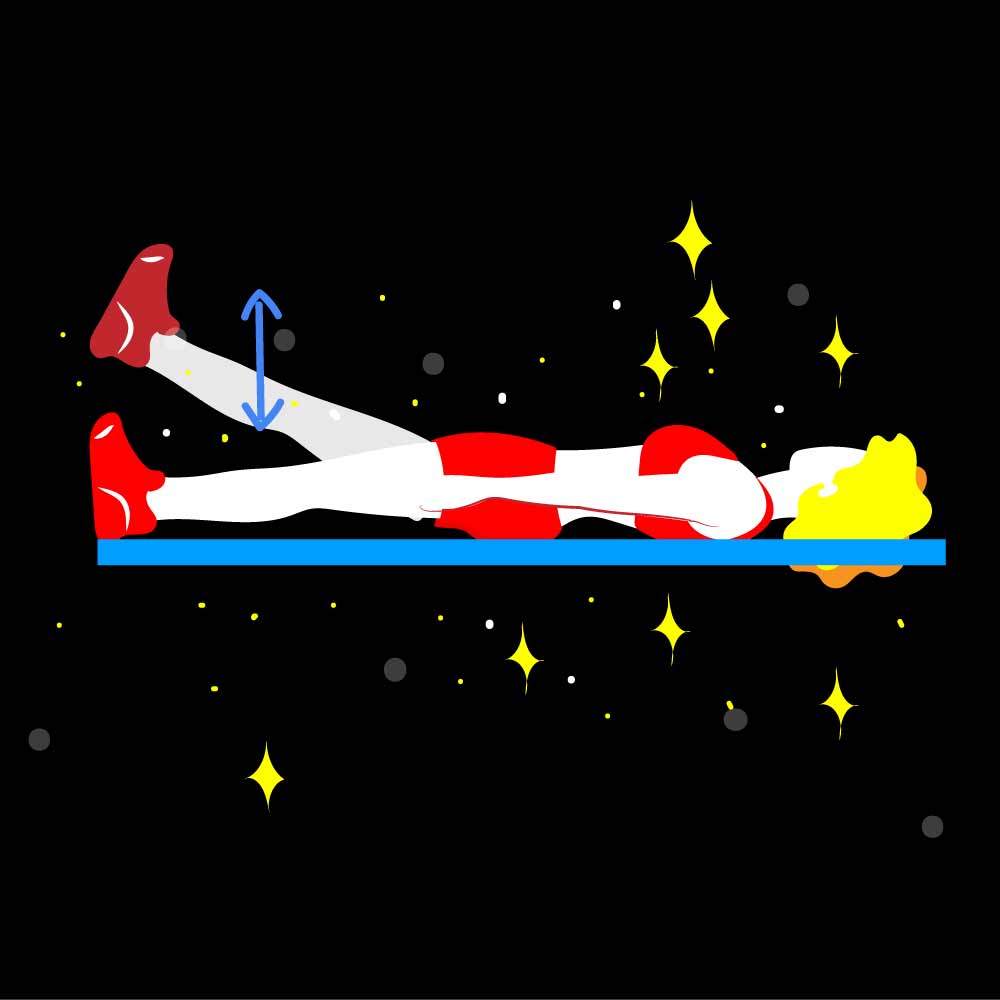

Straight-Leg Raise
Strengthens the front of your thigh
Equipment needed: Ankle weights
- Lie on the floor, keeping one leg straight and the other leg bent so that your foot is flat on the floor. Wear ankle weights on both ankles.
- Tighten the thigh muscle of the straight leg and slowly raise it 6 to 10 inches off the floor.
- Hold this position for 5 seconds and then relax and bring your leg to the floor.
- Complete a set of reps; then repeat with the opposite leg.
Tip: Keep your neck and shoulders relaxed.
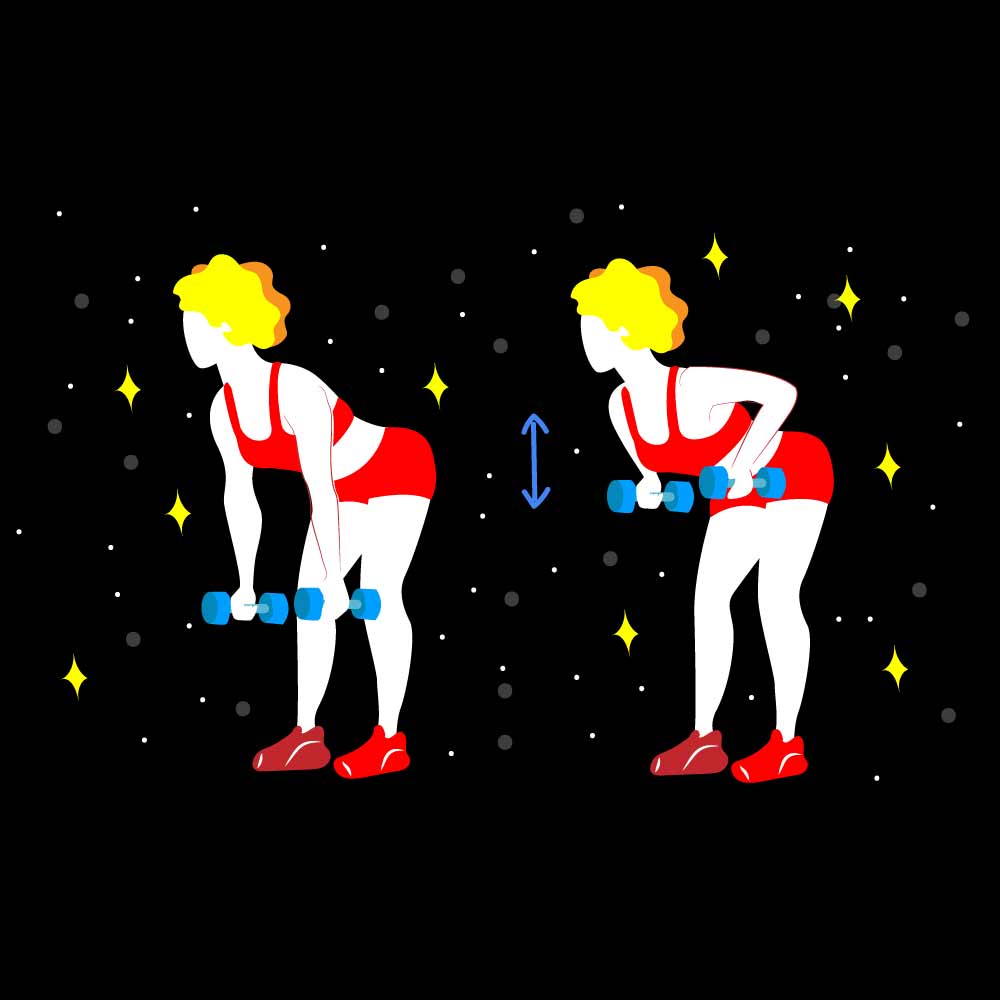

Bent-Over Rows
Strengthens shoulders and upper back
Equipment needed: Dumbbells
- Rest your left knee on a weight bench; your right leg is straight and foot flat on the floor. Lean forward, and support yourself with your left hand.
- Grasp a dumbbell in your right hand and hold it straight below your right shoulder.
- Slowly raise the weight until your elbow lines up just below your shoulder.
- Slowly lower the weight back down.
- Complete a set of reps; then repeat on opposite side.
Tip: If you don’t have a weight bench, stand with your feet comfortably apart. Then bend your knees and lean forward at the hips.
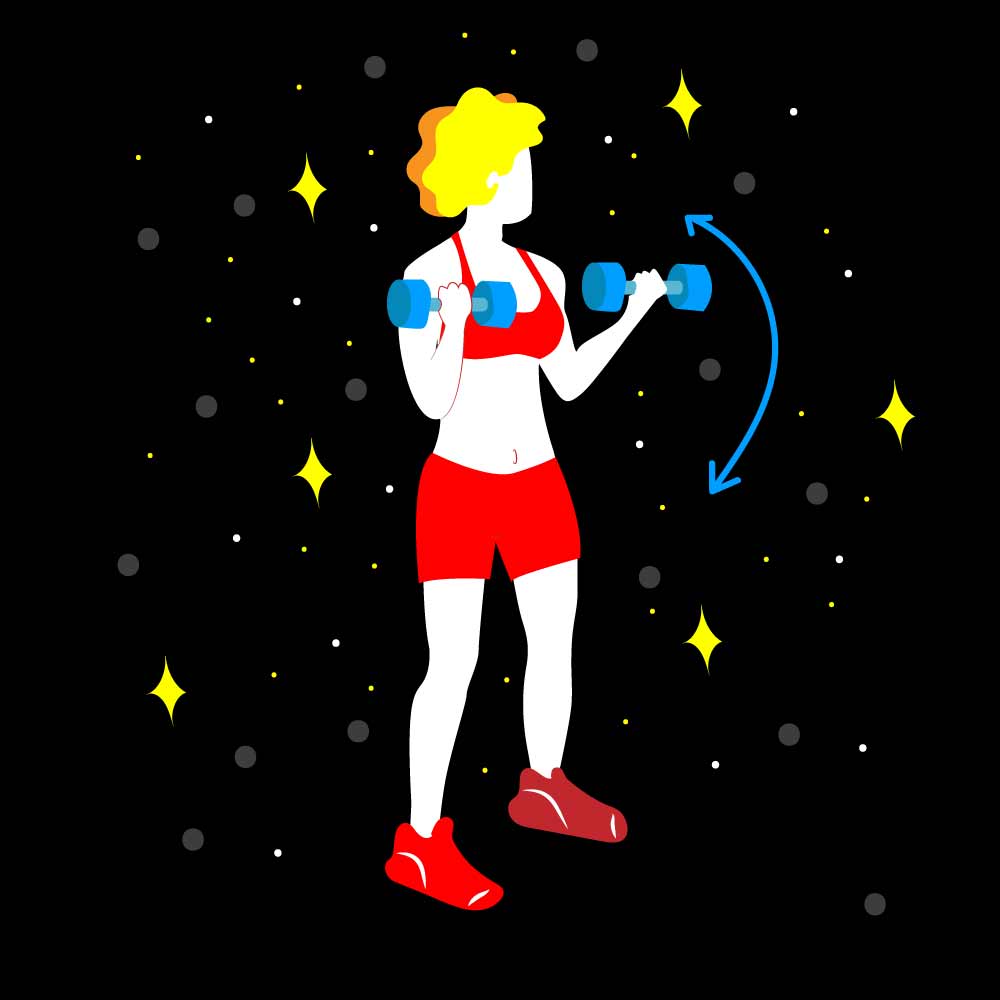

Bicep Curl
Strengthens front of upper arm
Equipment needed: Dumbbells
- Stand straight, with your feet about shoulder-width apart and knees slightly bent.
- Grasp a dumbbell in one hand, with your palm facing in front of you.
- Keeping your elbow close to your side, slowly curl the weight up toward your shoulder by bending your elbow.
- Slowly lower the weight to the starting position.
- Complete a set of reps; then repeat on opposite arm.
Tip: Don’t swing your arm or elbow during the exercise.
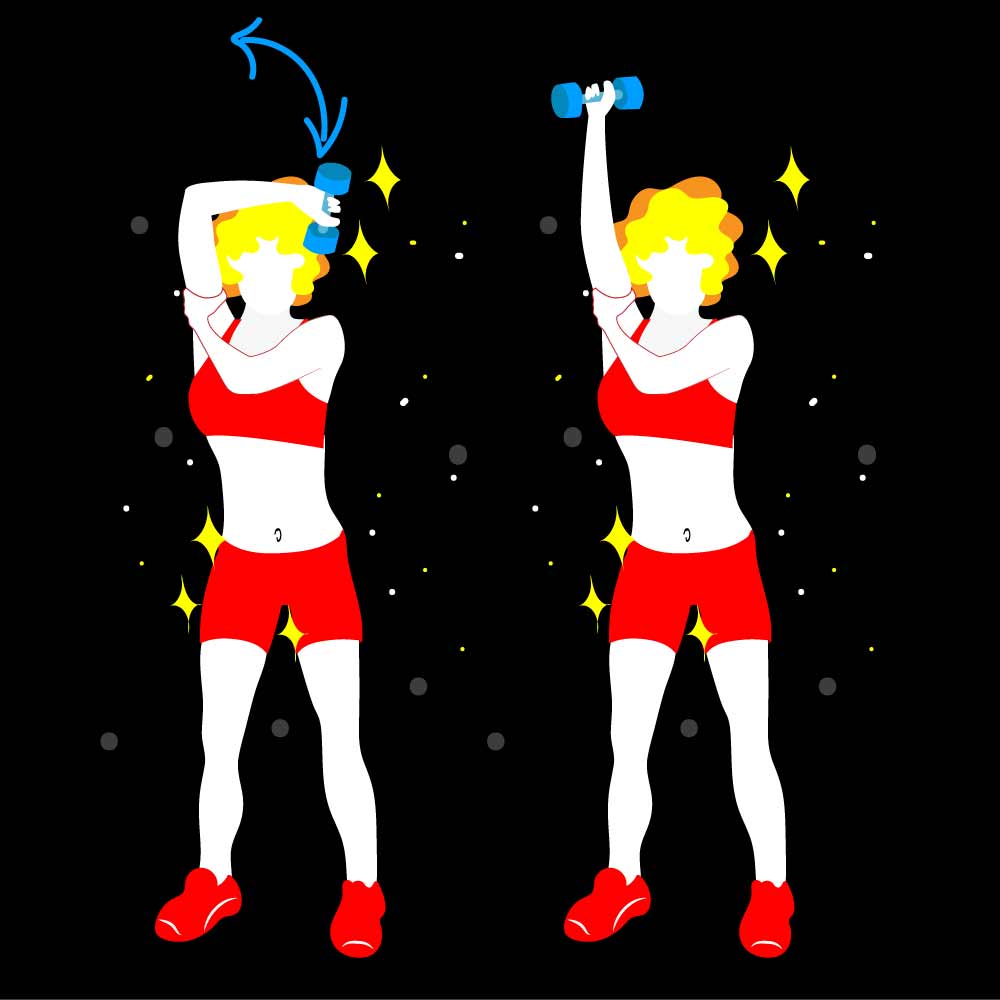

Tricep Extension
Strengthens back of upper arm
Equipment needed: Dumbbells
- Stand straight, with your feet about shoulder-width apart and knees slightly bent.
- Grasp a dumbbell in one hand. Then raise your arm up and bend your elbow, so the weight is behind your head. Place your opposite hand on your tricep for support.
- Slowly straighten your elbow and bring the weight overhead.
- Slowly lower your arm back down behind your head.
- Complete a set of reps; then repeat on opposite arm.
Tip: Keep your ab muscles tight and don’t arch your back.


