
Clunky airplane tray tables and cramped quarters you expect. And you can maneuver awkward armrest battles like a pro. What’s tougher to handle, however, is stiff and painful joints mid-flight. But for many people with arthritis, joint pain is as common during airplane travel as flight delays.
Here’s why: There’s fluid inside your joint called synovial fluid; its job is to lubricate the joint, explains Maura Daly Iversen, PT, DPT, SD, MPH, professor of physical therapy and rehabilitation at Northeastern University in Boston. “Think of it like motor oil in your car,” she says. Motor oil lubricates engine parts, which reduces friction and wear as they move. If your car sits parked in the cold for too long, however, the oil thickens and impacts how well the engine runs. The same is true for the fluid in your joints: “When you’re immobile for a period of time — such as on a long flight — synovial fluid can thicken and gel, causing stiffness in the joint,” explains Dr. Iversen, the Catherine Worthingham Fellow of the American Physical Therapy Association.
To help prevent stiff joints at 35,000 feet, move a little at least once an hour, suggest experts at the Hospital for Special Surgery in New York City. Any form of activity, such as walking about the cabin when it’s safe to do so or stretching in your seat, helps keep your joints lubricated to ease arthritis symptoms.
Tips Before You Board
Check with your doctor or physical therapist on how to best manage your particular arthritis pain and stiffness and make your flight more comfortable. They will consider the current limits of your joints and can help choose mid-flight exercises or stretches that work within those limits. You may also want to talk to your doctor about your current medication regimen, and whether you may need any changes to while you travel. Your doctor may suggest you bring medication that could help in the event of an unexpected arthritis flare, for example.
More pre-flight advice:
Store your carry-on luggage overhead. Even though you’re usually allowed to place a bag under the seat in front of you, try to leave that space clear to give your feet more moving room, suggests Dr. Iversen. (If your arthritis makes it challenging to lift a bag overhead, make sure to ask a fellow passenger for help.)
Pay for extra leg room. Many airlines offer the option to buy a seat with more leg room for an additional fee. The extra inches will give you a bit more room to stretch out. Whenever possible, book an aisle seat or see if you can switch to one when you check in for the flight. This will make it easier to get up and walk up and down the aisle.
Support your joints. To help ease lower back pain, ask for an extra pillow to place in the lumbar area (the small of your back), suggests Dr. Iverson. Rest a soft blanket on your armrest if you have elbow pain. And if you tend to nap during flights, pack an inflatable neck pillow to reduce stress on your neck.
Consider special treatment to improve your mobility. If your arthritis pain affects your mobility, ask for a wheelchair assistance at the airport and to board the plane. That may reduce some of the stress of rushing through the airport — stress that can increase muscle tension and joint pain, adds Dr. Iversen. It may also allow for early boarding, if necessary; and get you help carrying your luggage and lifting it into the overhead bin.
Airplane Exercises to Help Prevent Joint Stiffness
Focus on simple, range-of-motion exercises, suggests Dr. Iversen. Start with the lowest part of your body and work your way up. Here are some mid-flight moves she recommends, though you should always check with your doctor or physical therapist to make sure they are safe for you.
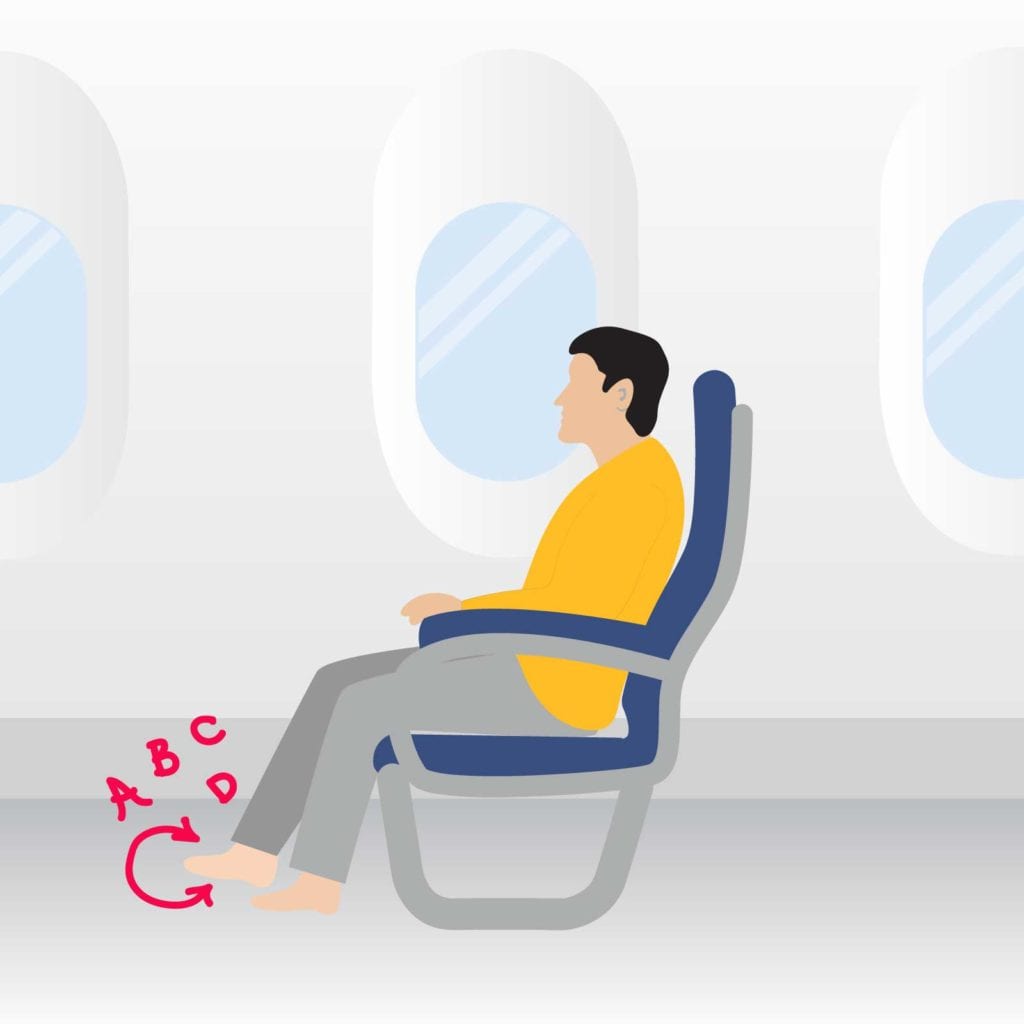

Toe Drawing
From a seated position
- Remove your shoes.
- Using the tip of your toes on one foot, draw the alphabet or a set of symbols — anything you want, says Dr. Iversen. “The idea is to get the joints moving in your feet and ankles.”
- Repeat on the opposite side.
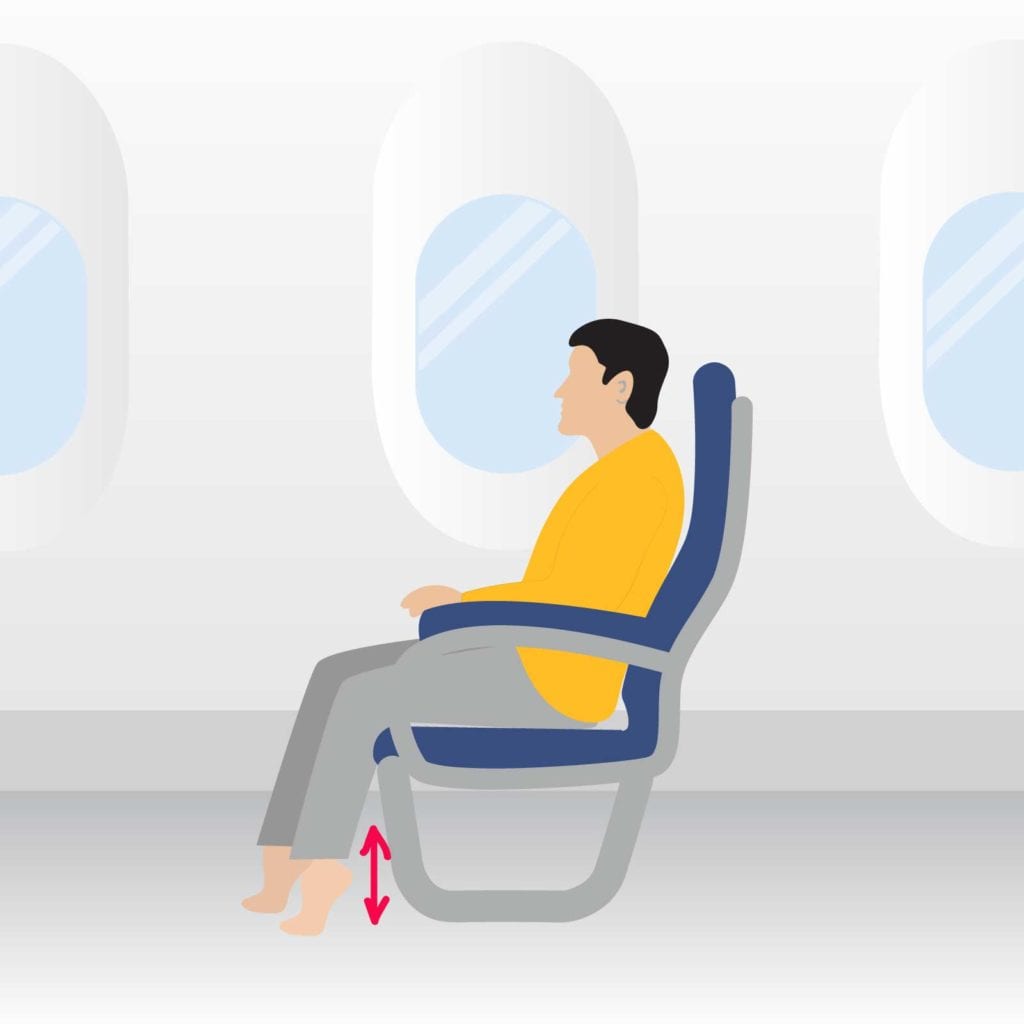

Ankle Pump
From a seated position
- Start with your feet flat on the floor.
- Lift both heels, while keeping the balls of your feet on the floor.
- Hold for a few seconds, then lower heels. Then, lift the balls of your feet, keeping your heels in the floor.
- Repeat the sequence.
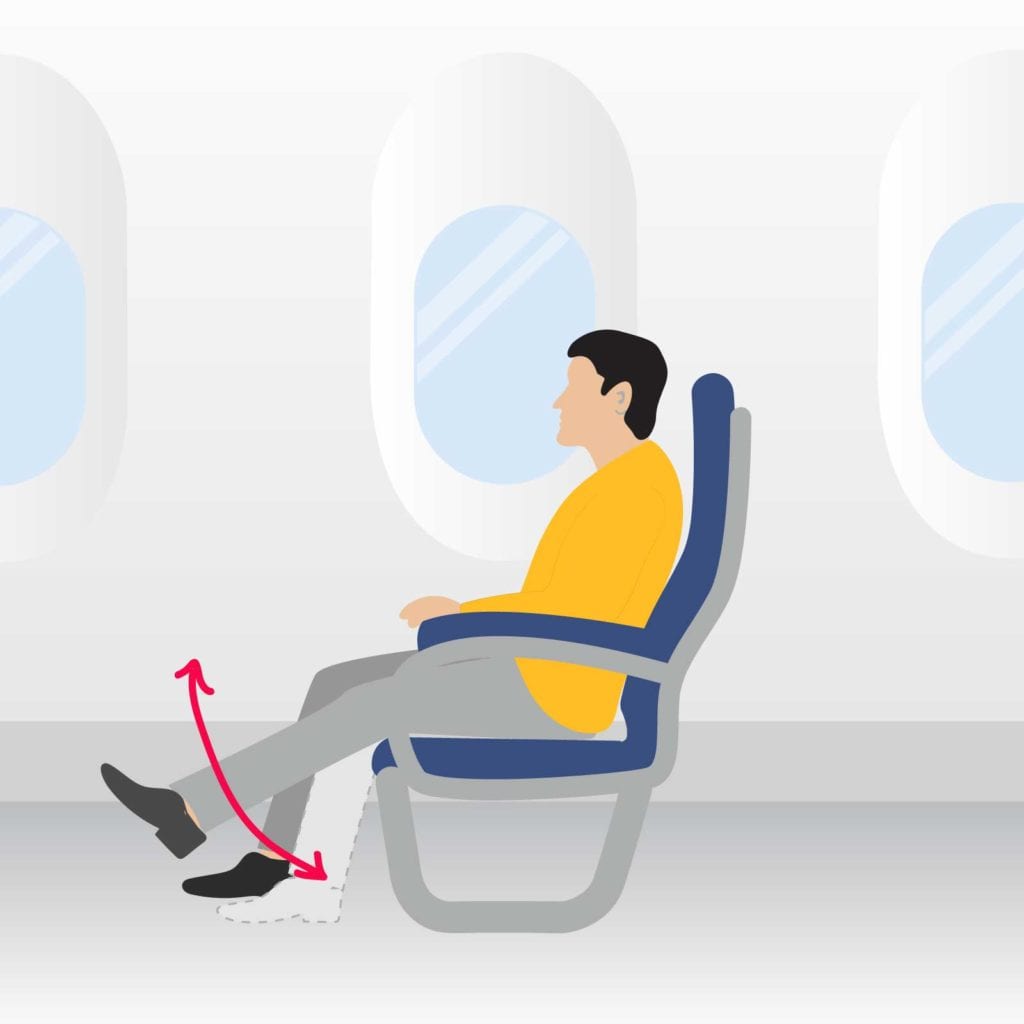

Knee Extension
From a seated position
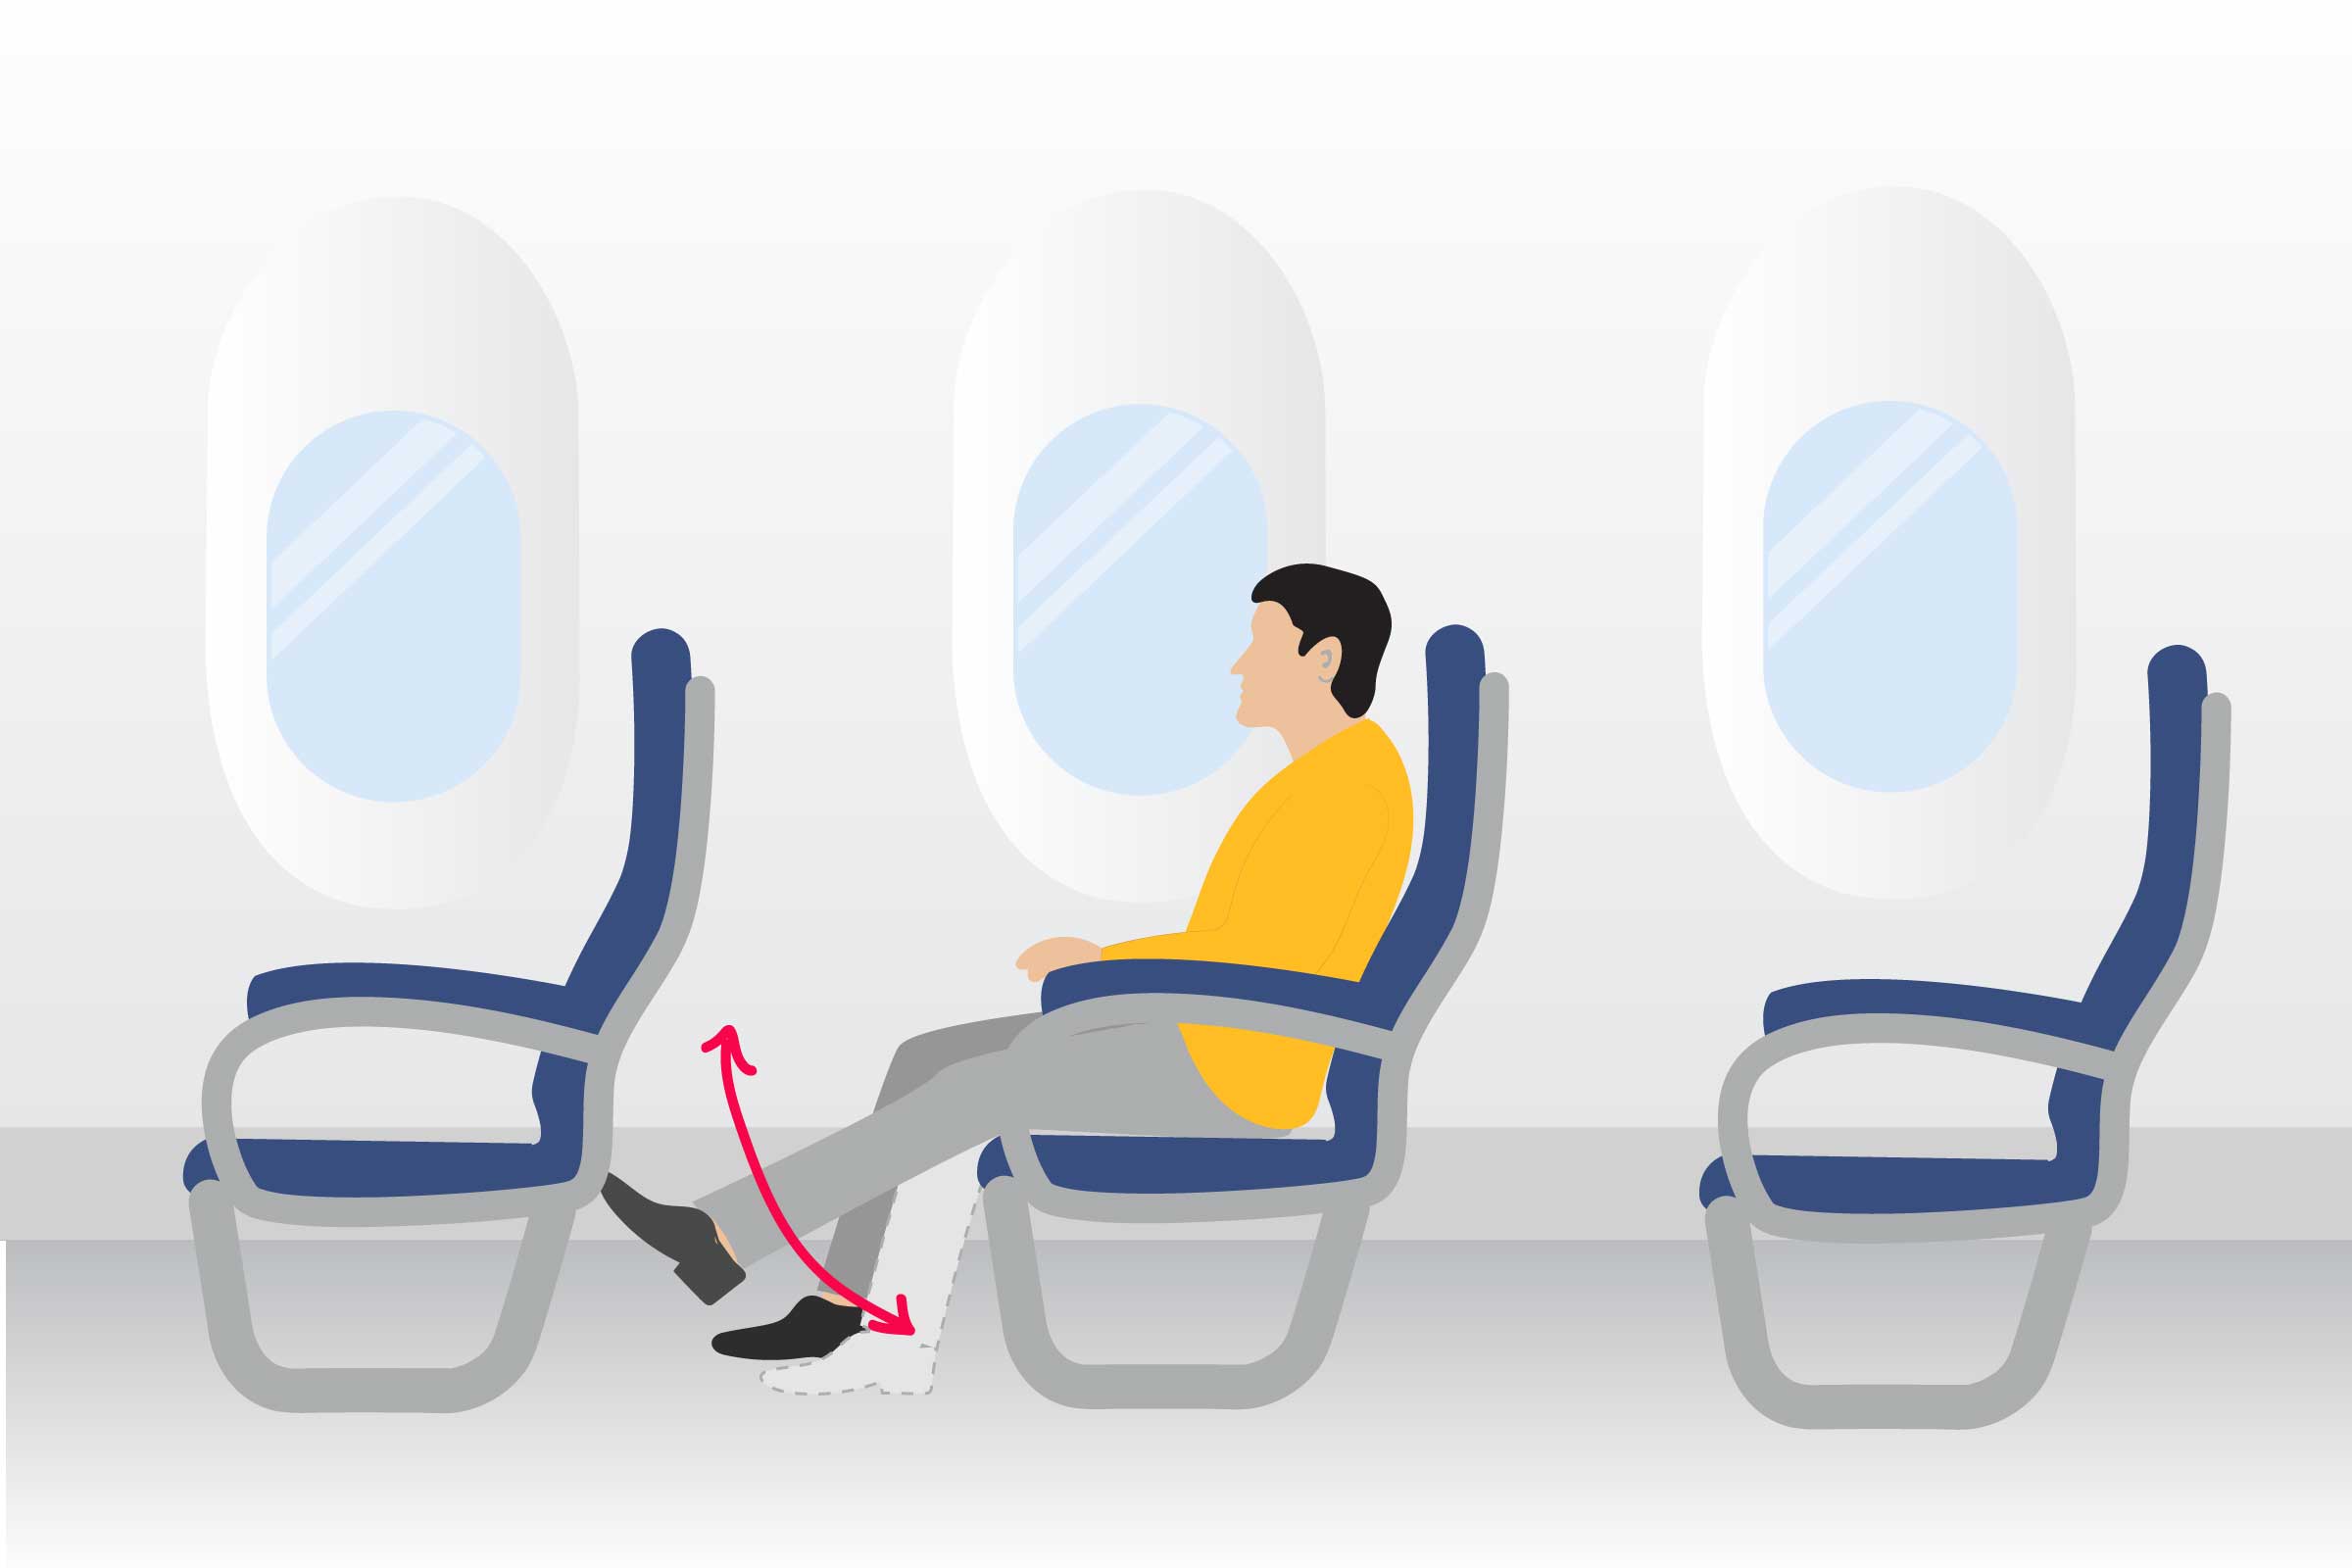
- Sit up straight, with your feet on the floor.
- Tighten your right thigh muscle, and slowly raise and straighten your right leg in front of you as high as you have room. (Most of the time, you can get to about a 60-degree lift with the seat in front of you, says Dr. Iversen.)
- Hold for a few seconds, then lower.
- Repeat on the opposite side.
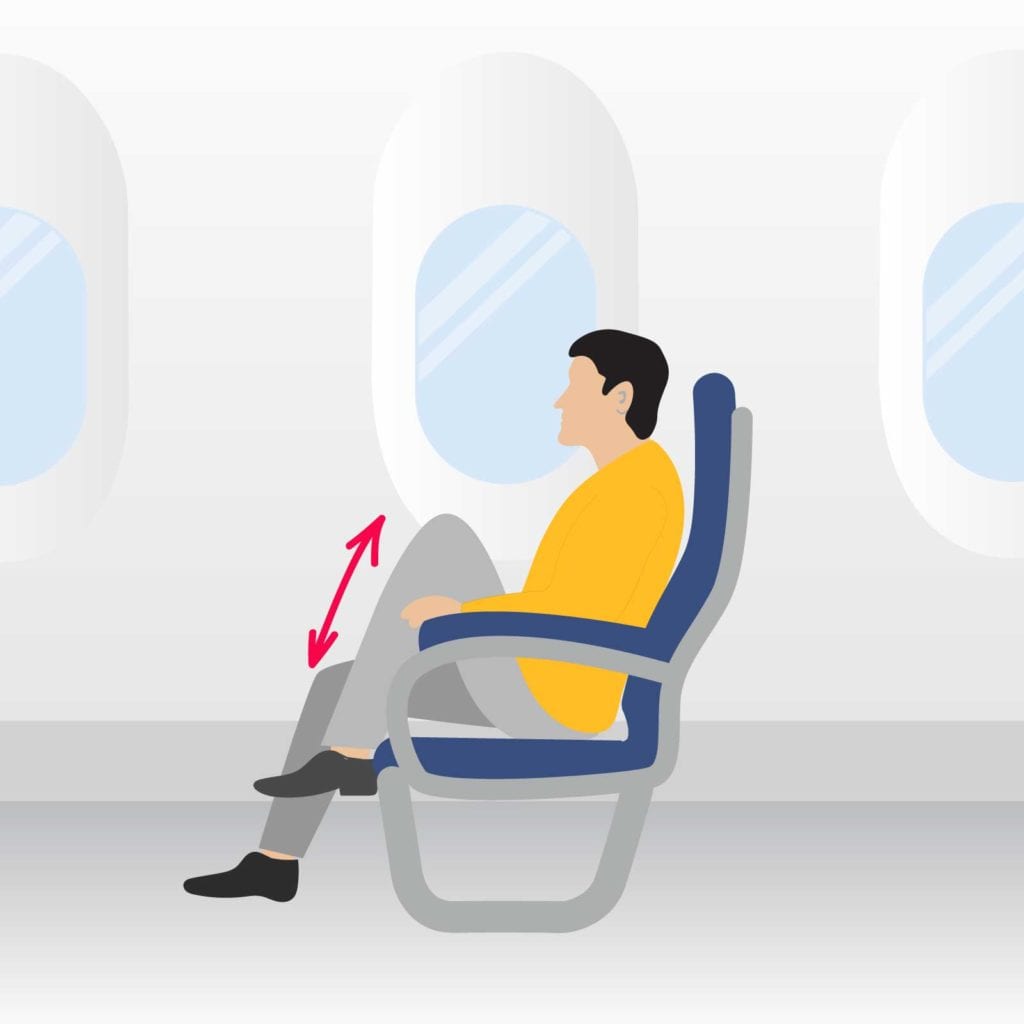

Slow ‘March’
From a seated position
- Sit up straight with your feet on the floor.
- With your knee bent, slowly lift one leg up toward your chest, as high as you comfortably can. (Grasp the armrests for balance, if needed.)
- Slowly lower your leg.
- Repeat on the opposite side. Then repeat the sequence.
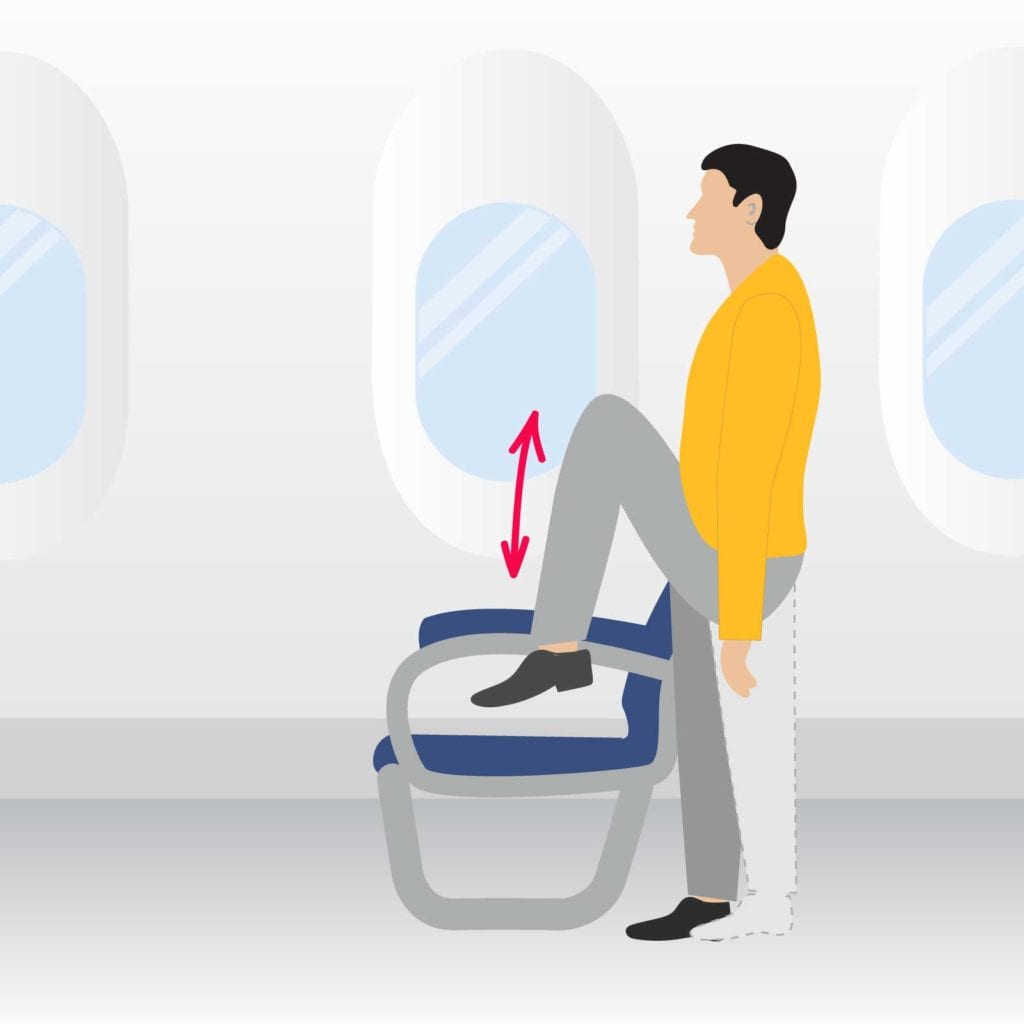

Slow ‘March’
From a standing position
- Stand in the aisle or in the area near the bathroom (when it’s safe to move about the cabin).
- Balance on your right foot, holding on to a seat or wall to stay steady.
- Slowly lift your left foot until your knee is level with your hip, or as close to that position as you comfortably can.
- Slowly lower it back to the floor; then repeat with the other foot (as though you are slowly marching in place).
- Repeat the sequence.
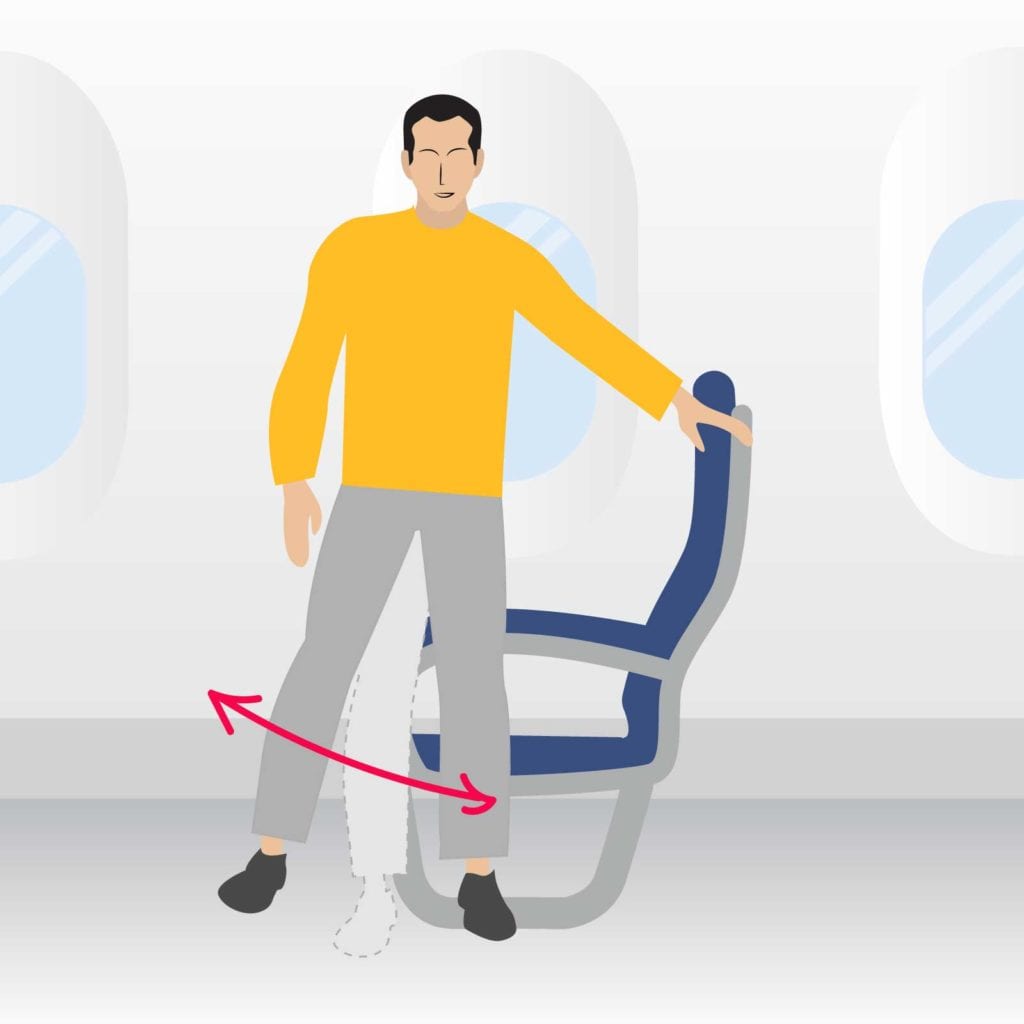

Hip Abduction
From a standing position
- Stand in the aisle or in the area near the bathroom (when it’s safe to move about the cabin).
- Balance on your right foot, holding on to a seat or wall to stay steady.
- In a slow, controlled movement, lift your left leg out to the side, away from your body; then slowly lower it back down.
- Repeat on opposite side.
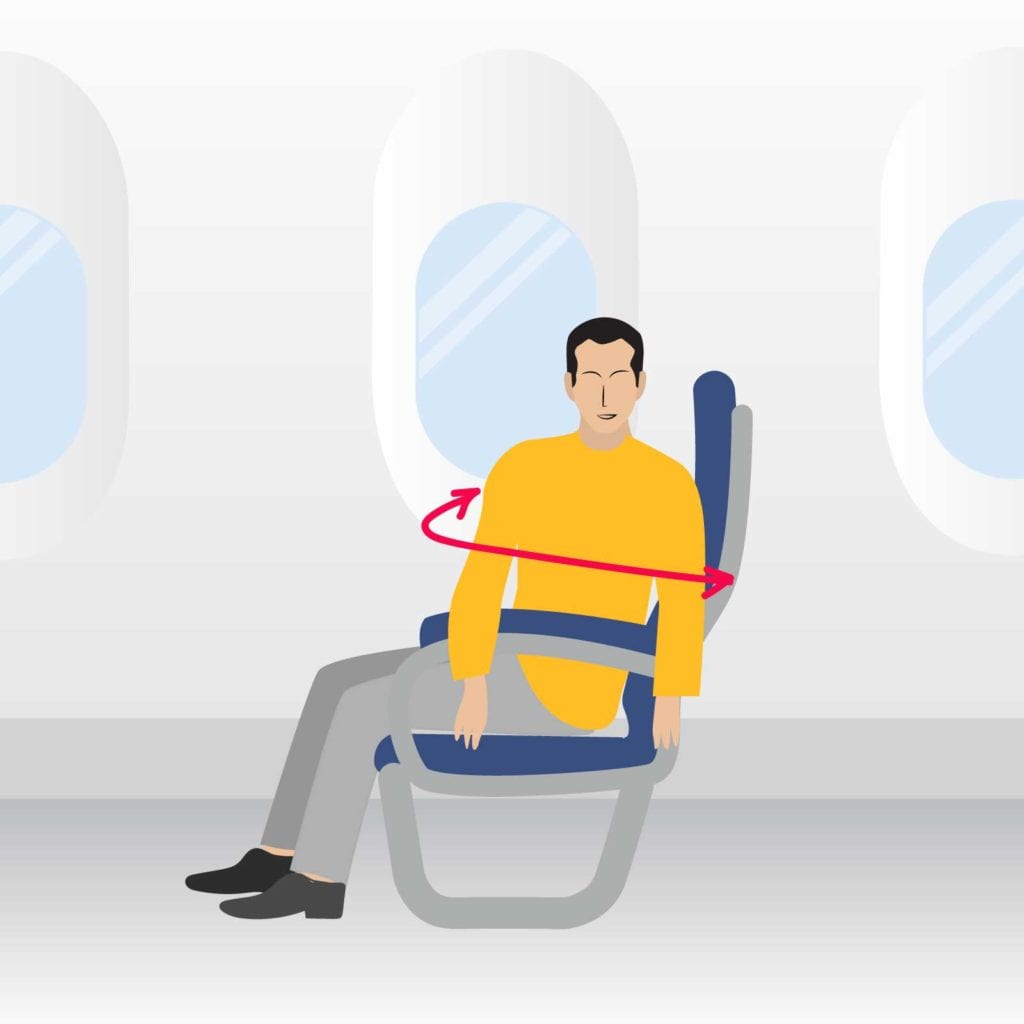

Gentle Twist
From a seated position or standing position
- Sit up straight, with your feet on the floor (or stand in the aisle or in the area near the bathroom when it’s safe to move about the cabin).
- Turn gently to your right, placing your left hand on the outside of your right knee (or thigh if you are standing).
- Hold for a few seconds, then return to start position.
- Repeat on the opposite side.
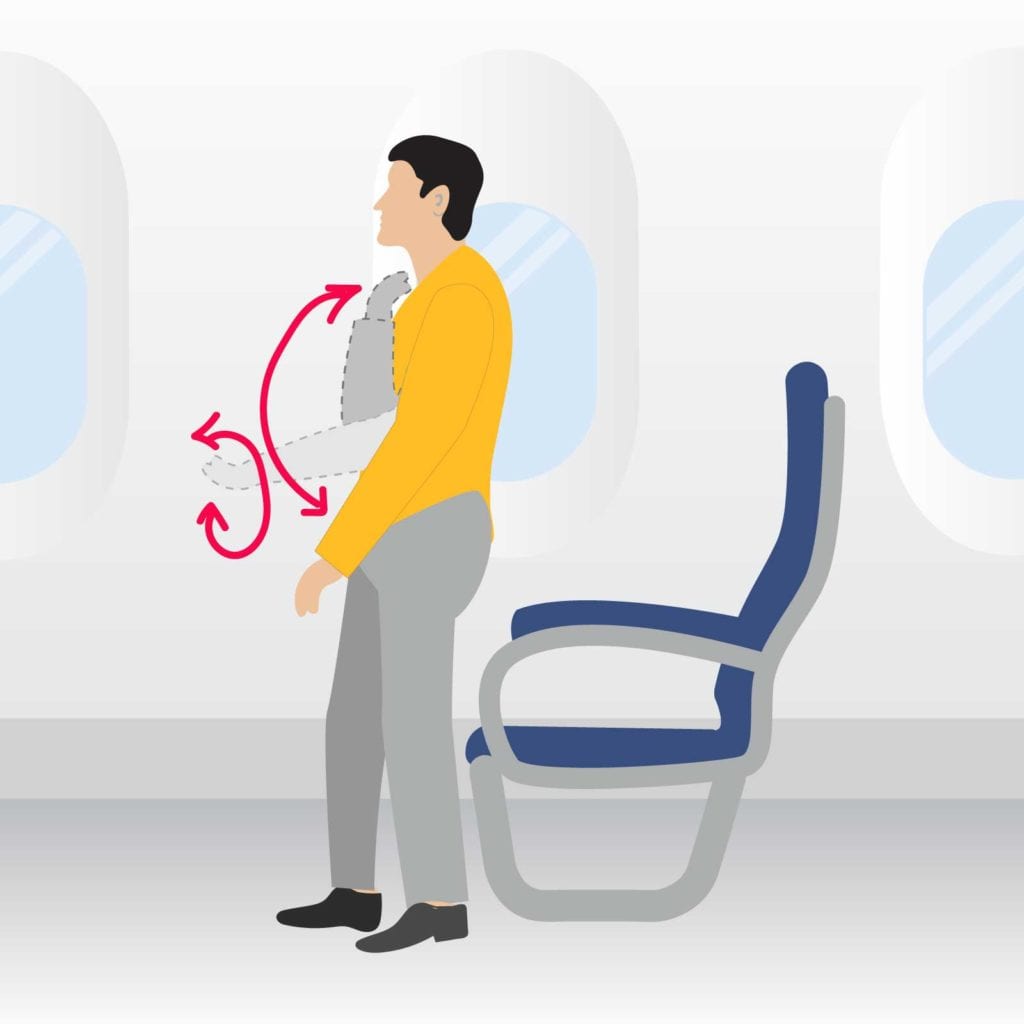

Weightless Bicep Curl with Rotation
From a seated or standing position
- Sit or stand up straight (when it’s safe to move about the cabin), with your arms hanging loosely by your sides.
- Bring the palms of your hands up toward your shoulders.
- Slowly lower them back down, and as you do turn your palms towards the floor until your arm is fully extended.
- Repeat.
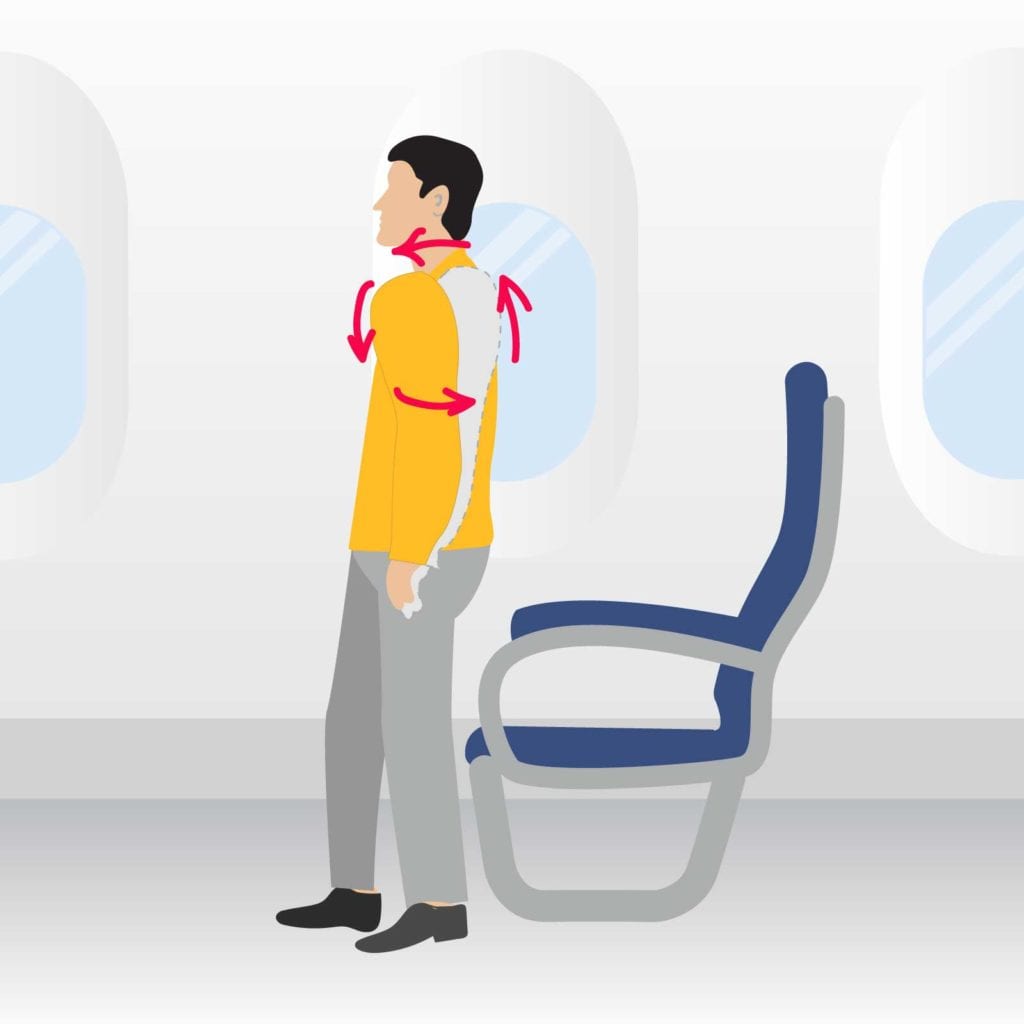

Shoulder Roll
From a seated or standing position
- Sit or stand up straight (when it’s safe to move about the cabin), with your chin tucked in.
- Shrug your shoulder up forward and up toward your ears, then slowly roll them back and down, in a circular motion.
- Repeat, then reverse direction.
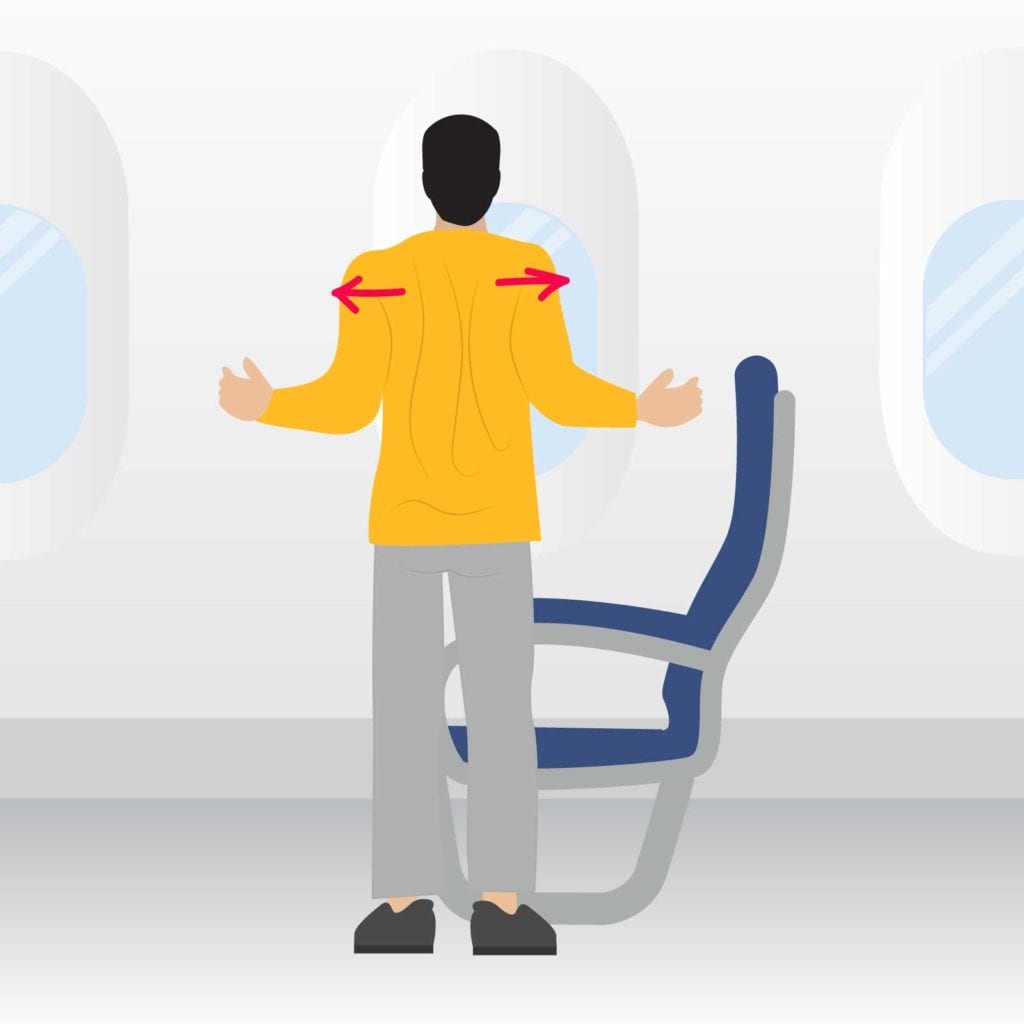

Shoulder Retraction
From a seated or standing position
- Sit or stand up straight (when it’s safe to move about the cabin), with your arms hanging loosely by your sides.
- Push your arms back, gently squeezing your shoulder blades together.
- Hold for a few seconds, then return to start position. Repeat.


